Tag: DIY
-
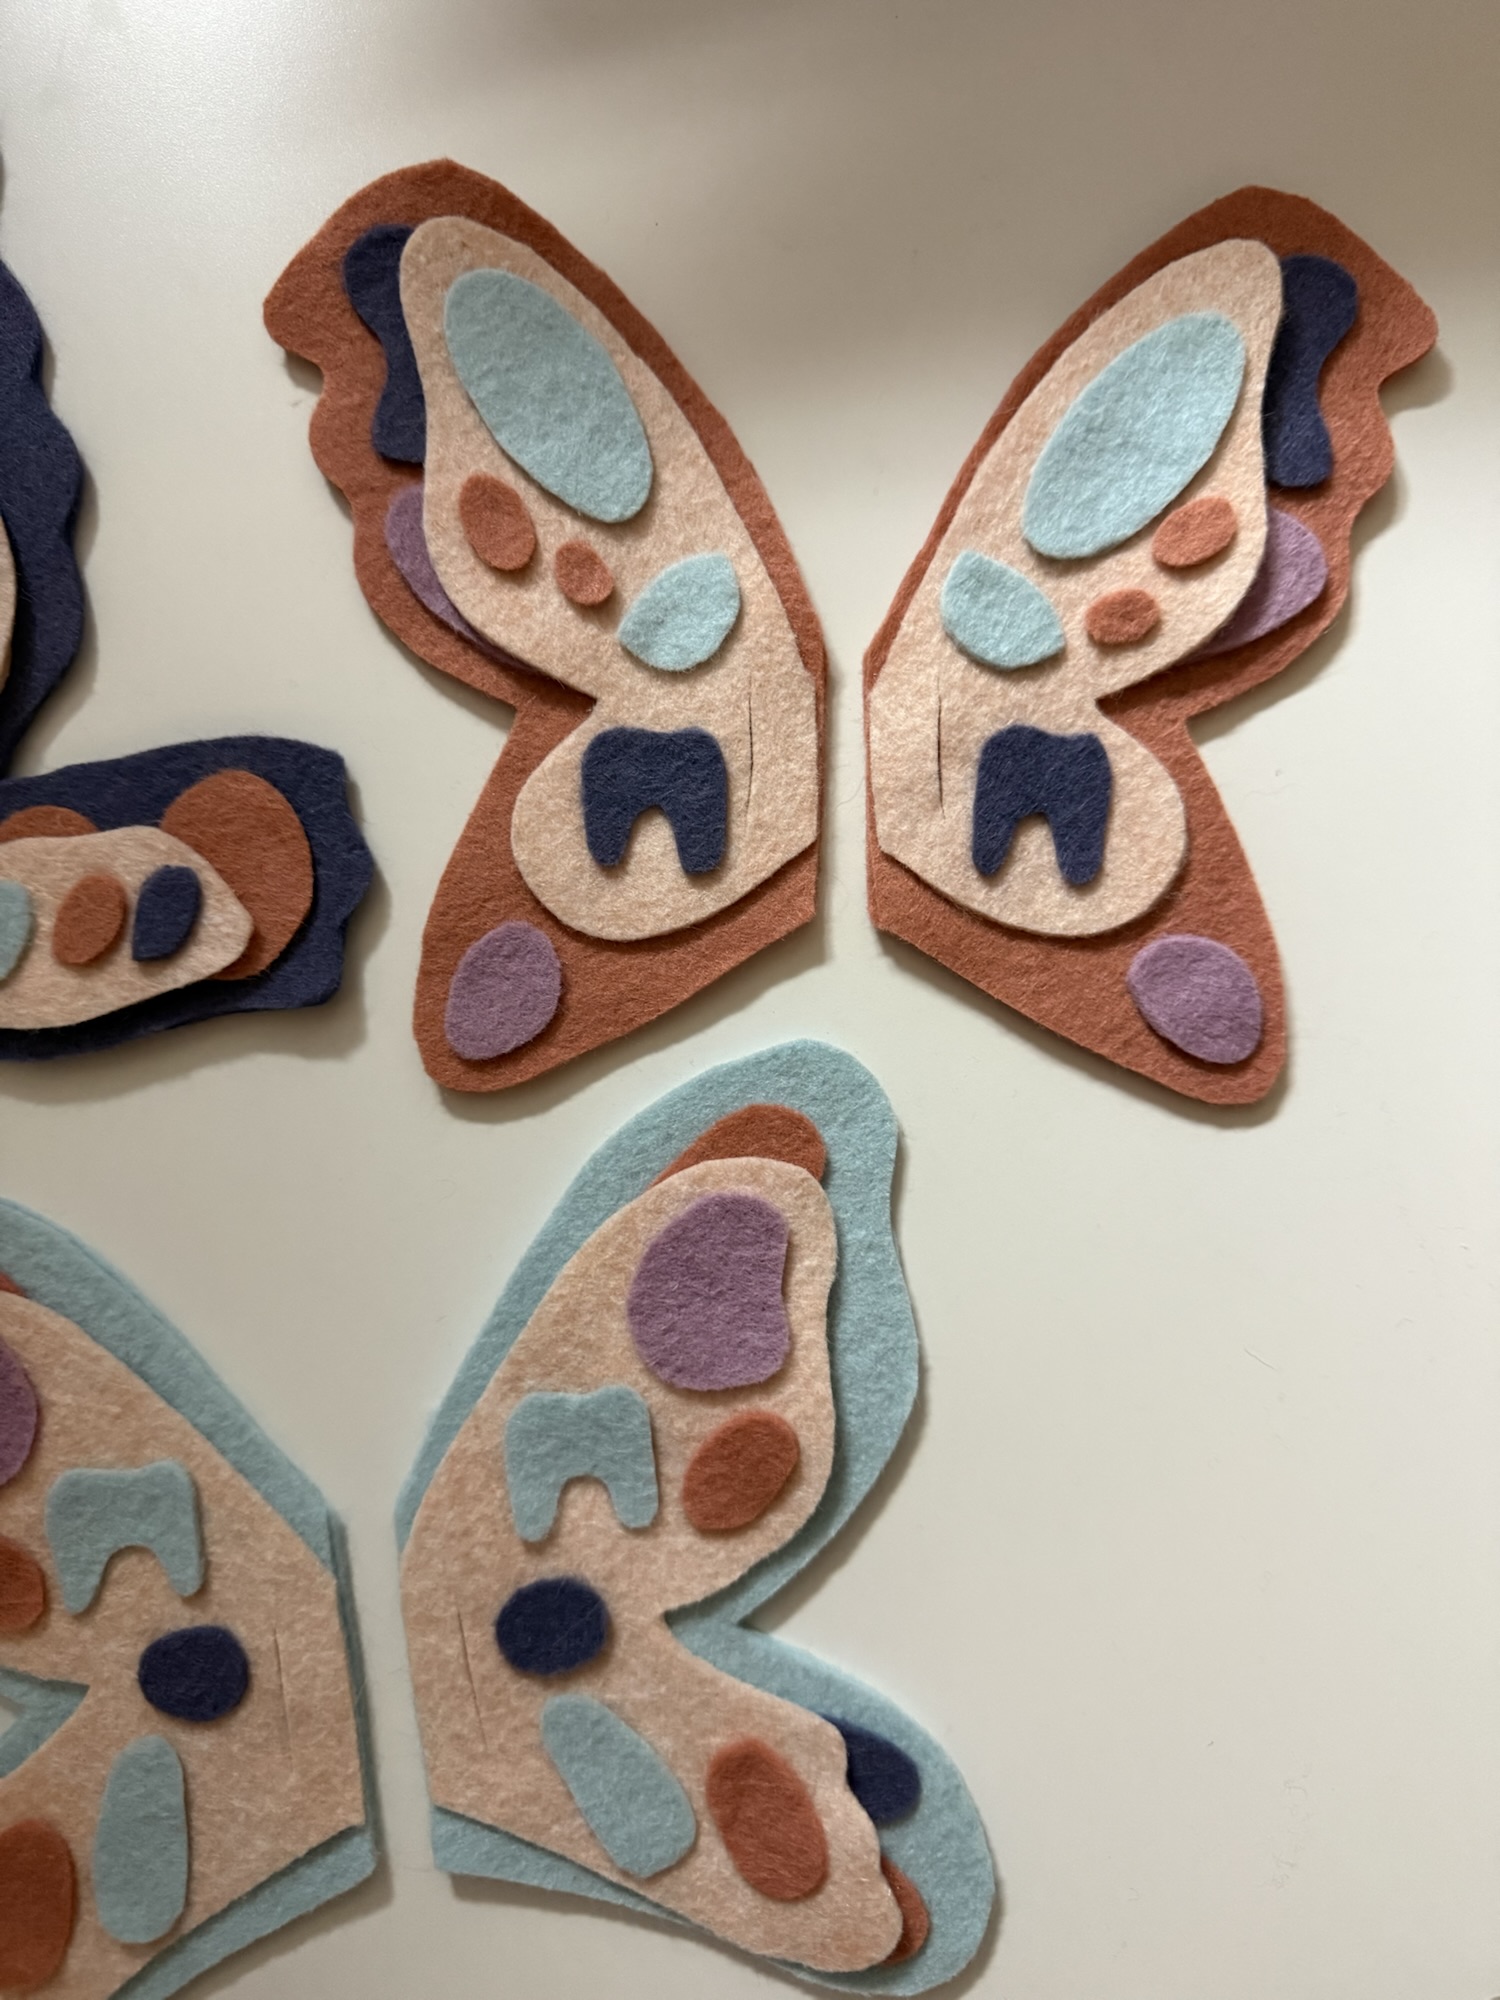
fairy wings.
Story time! My little lost his first tooth, and I accidentally caused panic when I told him about the tooth fairy. Just some rando who comes into your home uninvited and takes your teeth? Hard pass. ❌ But we couldn’t not celebrate this childhood milestone, so after some consoling and…
-
how charming.
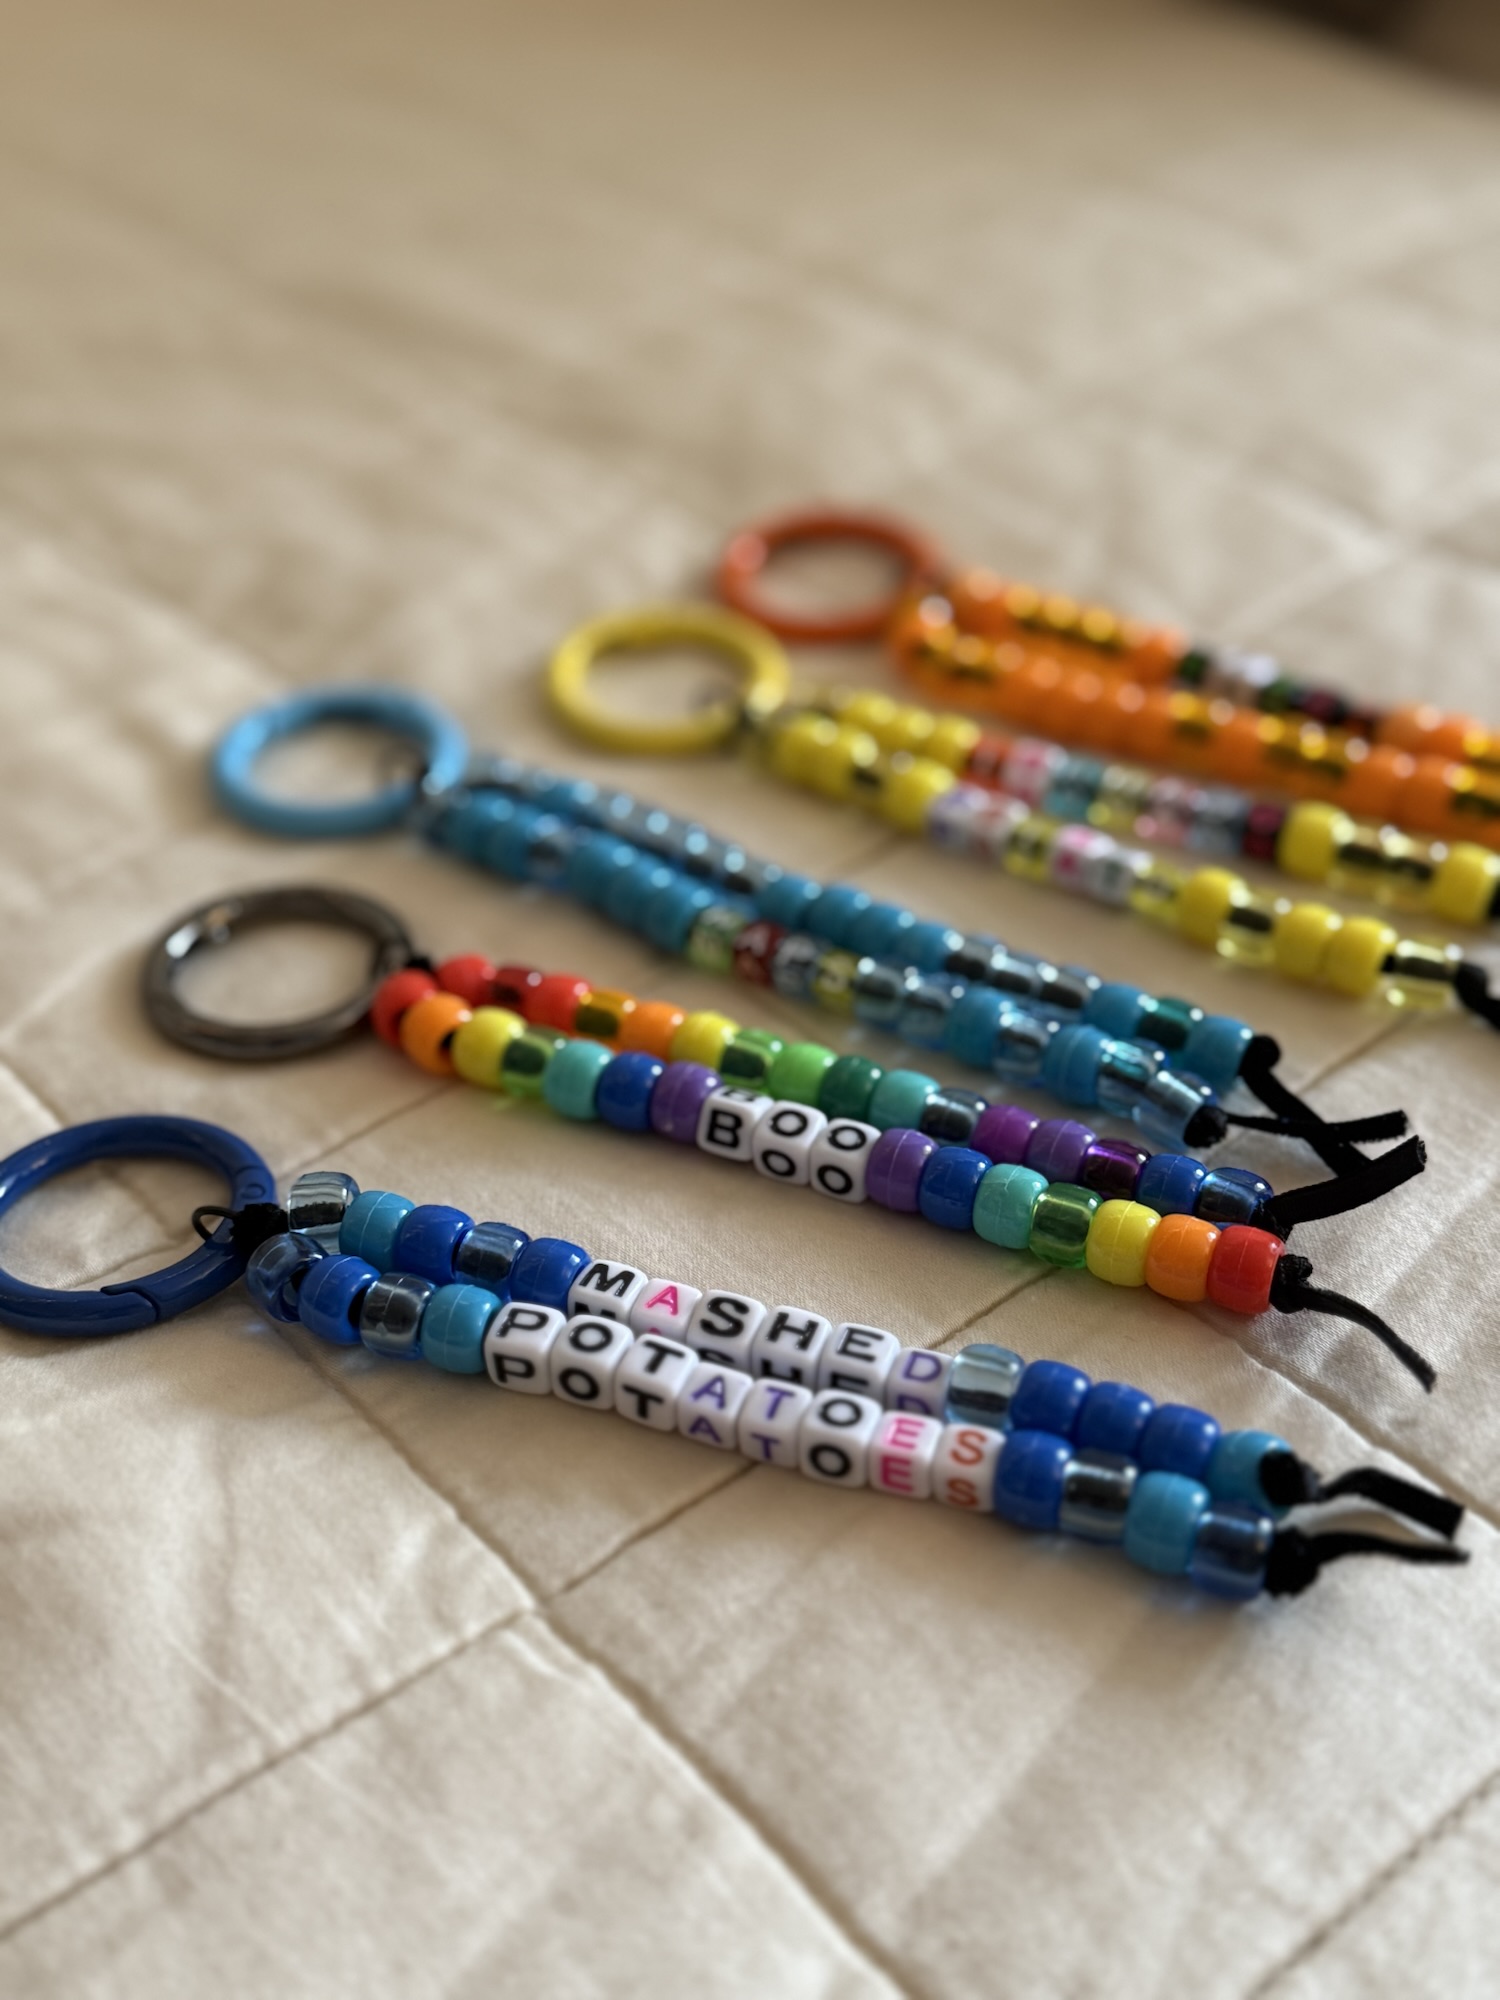
I am on a bag charm kick! We made bag charms as thank you gifts for a recent school fundraiser, and then bag charms for my kid’s Super Mario birthday celebration. We had a few supplies leftover from the birthday craft so we thought it would be fun to make…
-

beaded bows.
Just in time for bow season! All you need for this wire bow craft is wire and beads, plus pliers and optional wire cutters. You want to use a wire that is sturdy enough to hold shape with the type of beads you’re using, but is also malleable enough to…
-

spooky garden.
I’ve swooned over them before, and I’ll swoon over them again – The Nurtured Seedling crew are masters at turning a garden into something so magical for the littles and their grown ups. Remember Earth Day? Ya, pretty epic. And for their Littlest Gardeners Fall Class, owners Flavia and Darina…
-

casual tie dye.
For my kid’s preschool it’s tradition for families to gather before the biggest community event of the year and create tie dye shirts. This year we had a ton of leftover dye from the event so I got to use some of my dye stuffs collection to create a few…
-

3-tier plant hanger.
Sharing my largest plant hanger creation so far – it’s as tall as me. 🙂 This was a fun project because I just…made! At first, I intended for this project to end up a macra-weave piece, but then it morphed into a macrame plant hanger. No regrets! I used classic…
-
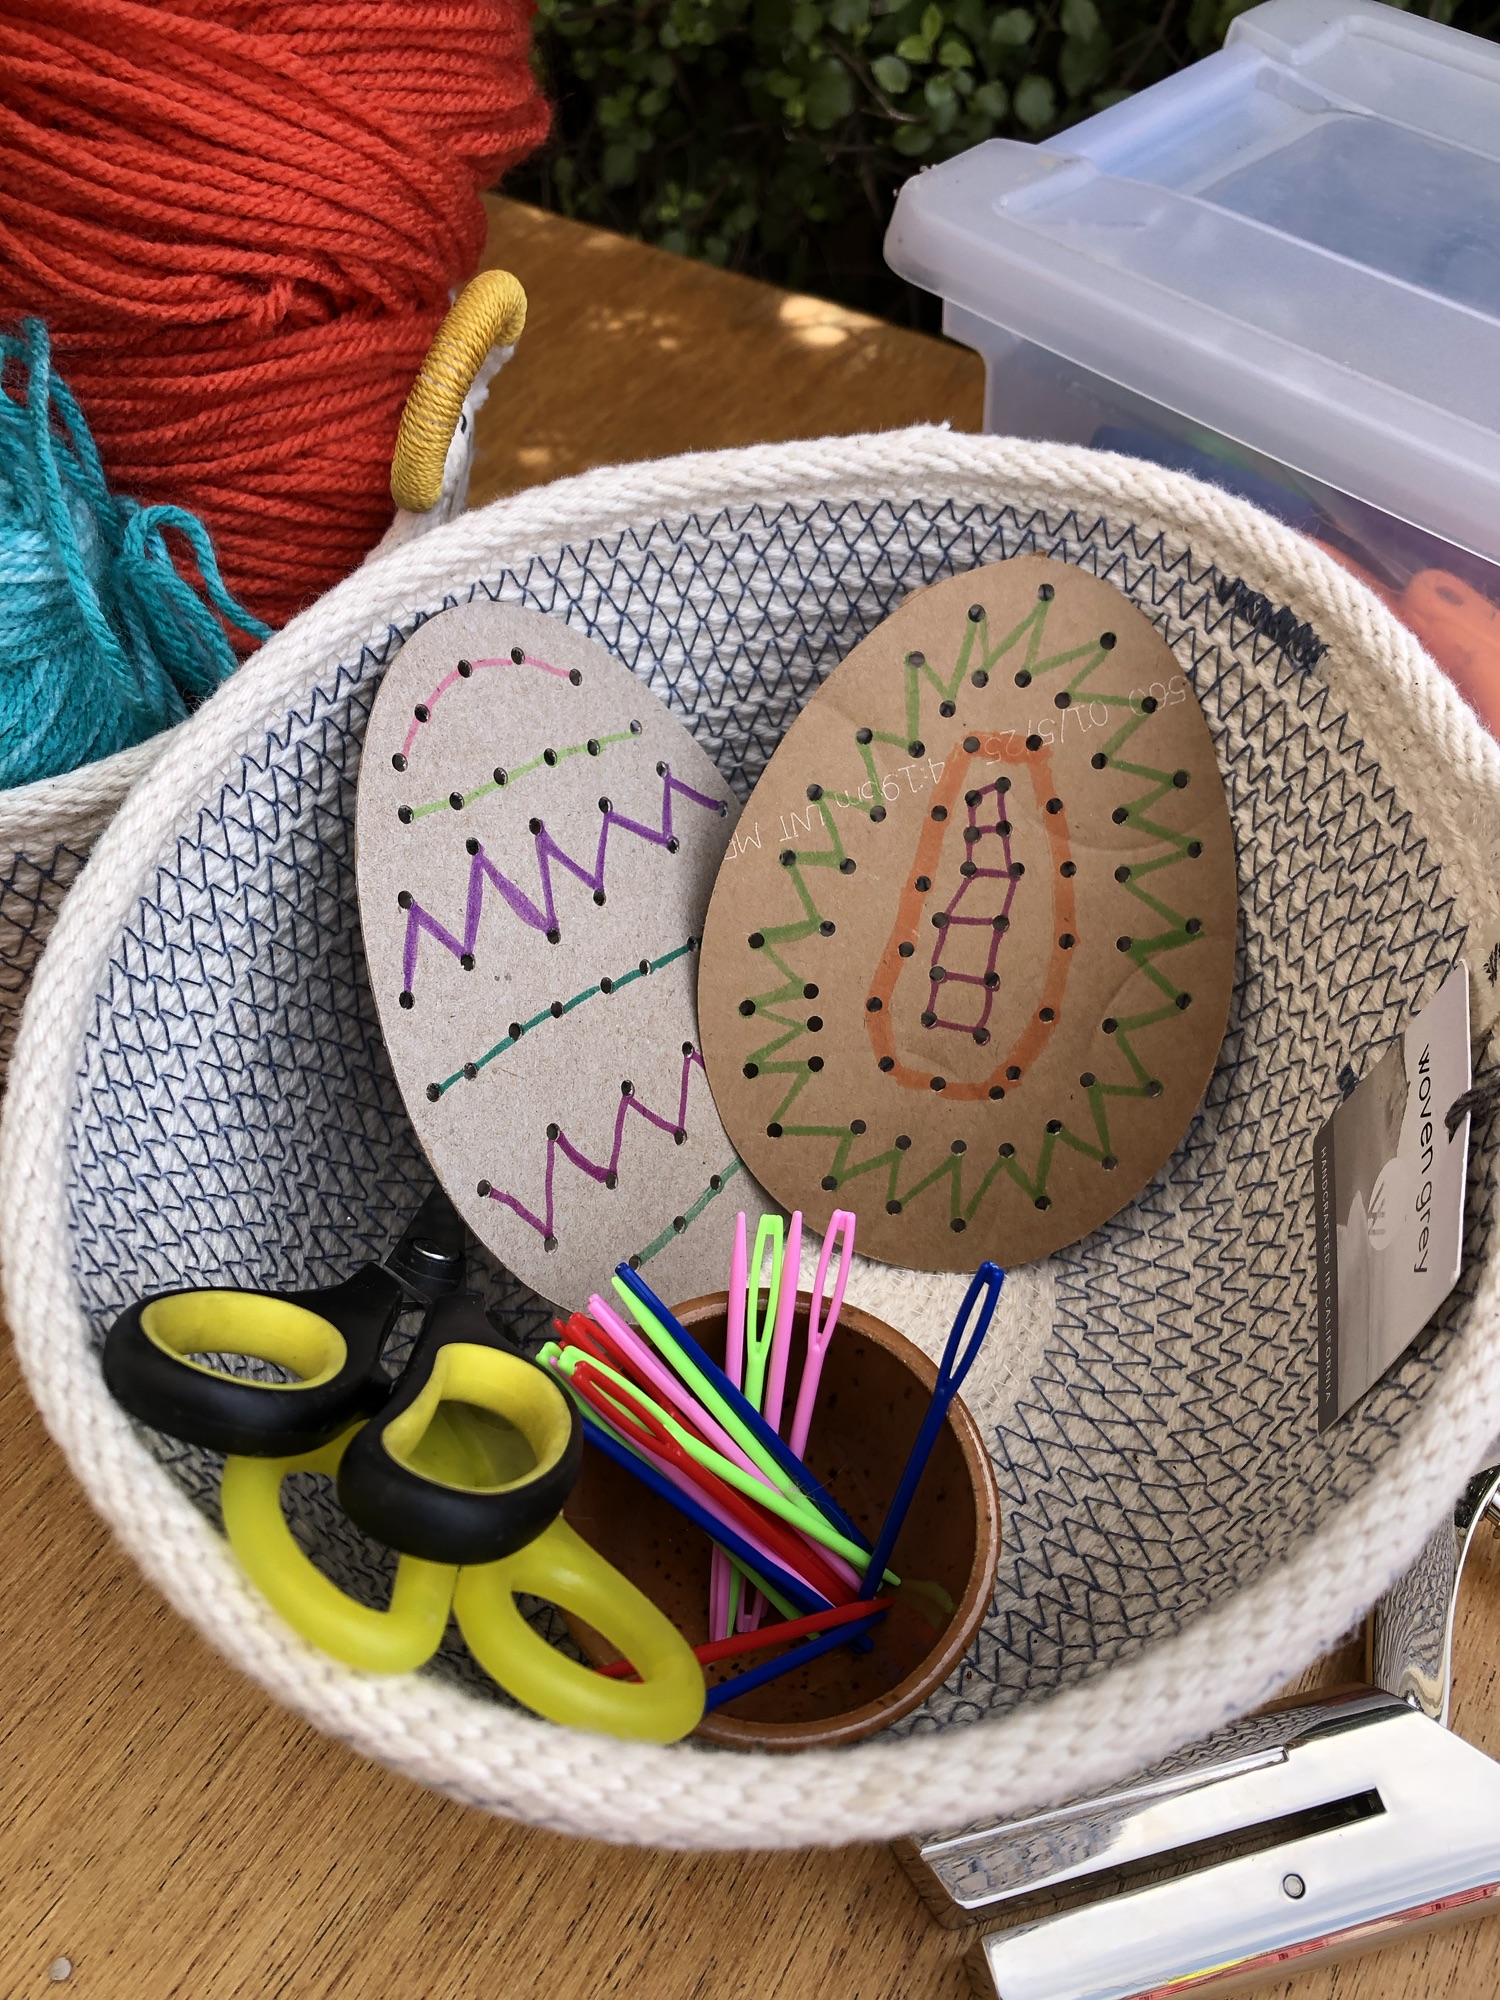
lacing eggs.
For my third and final Easter egg this season, take a peek into Ocean View Brew Works‘ super chill weekend morning crafty vibes with an upcycled egg project! Owner Vonnie (who also teaches after school sewing classes!) set up a creative station with precut egg shapes (made with drink and…
-

12 days of creative kit gift ideas.
Looking for a creative way to spend your winter break/reset? How about 12 creative ways? I appreciate a good craft kit and experiential gift so here are a few creative kit ideas for yourself or your loved ones to do solo or together this season – one for each day…
-
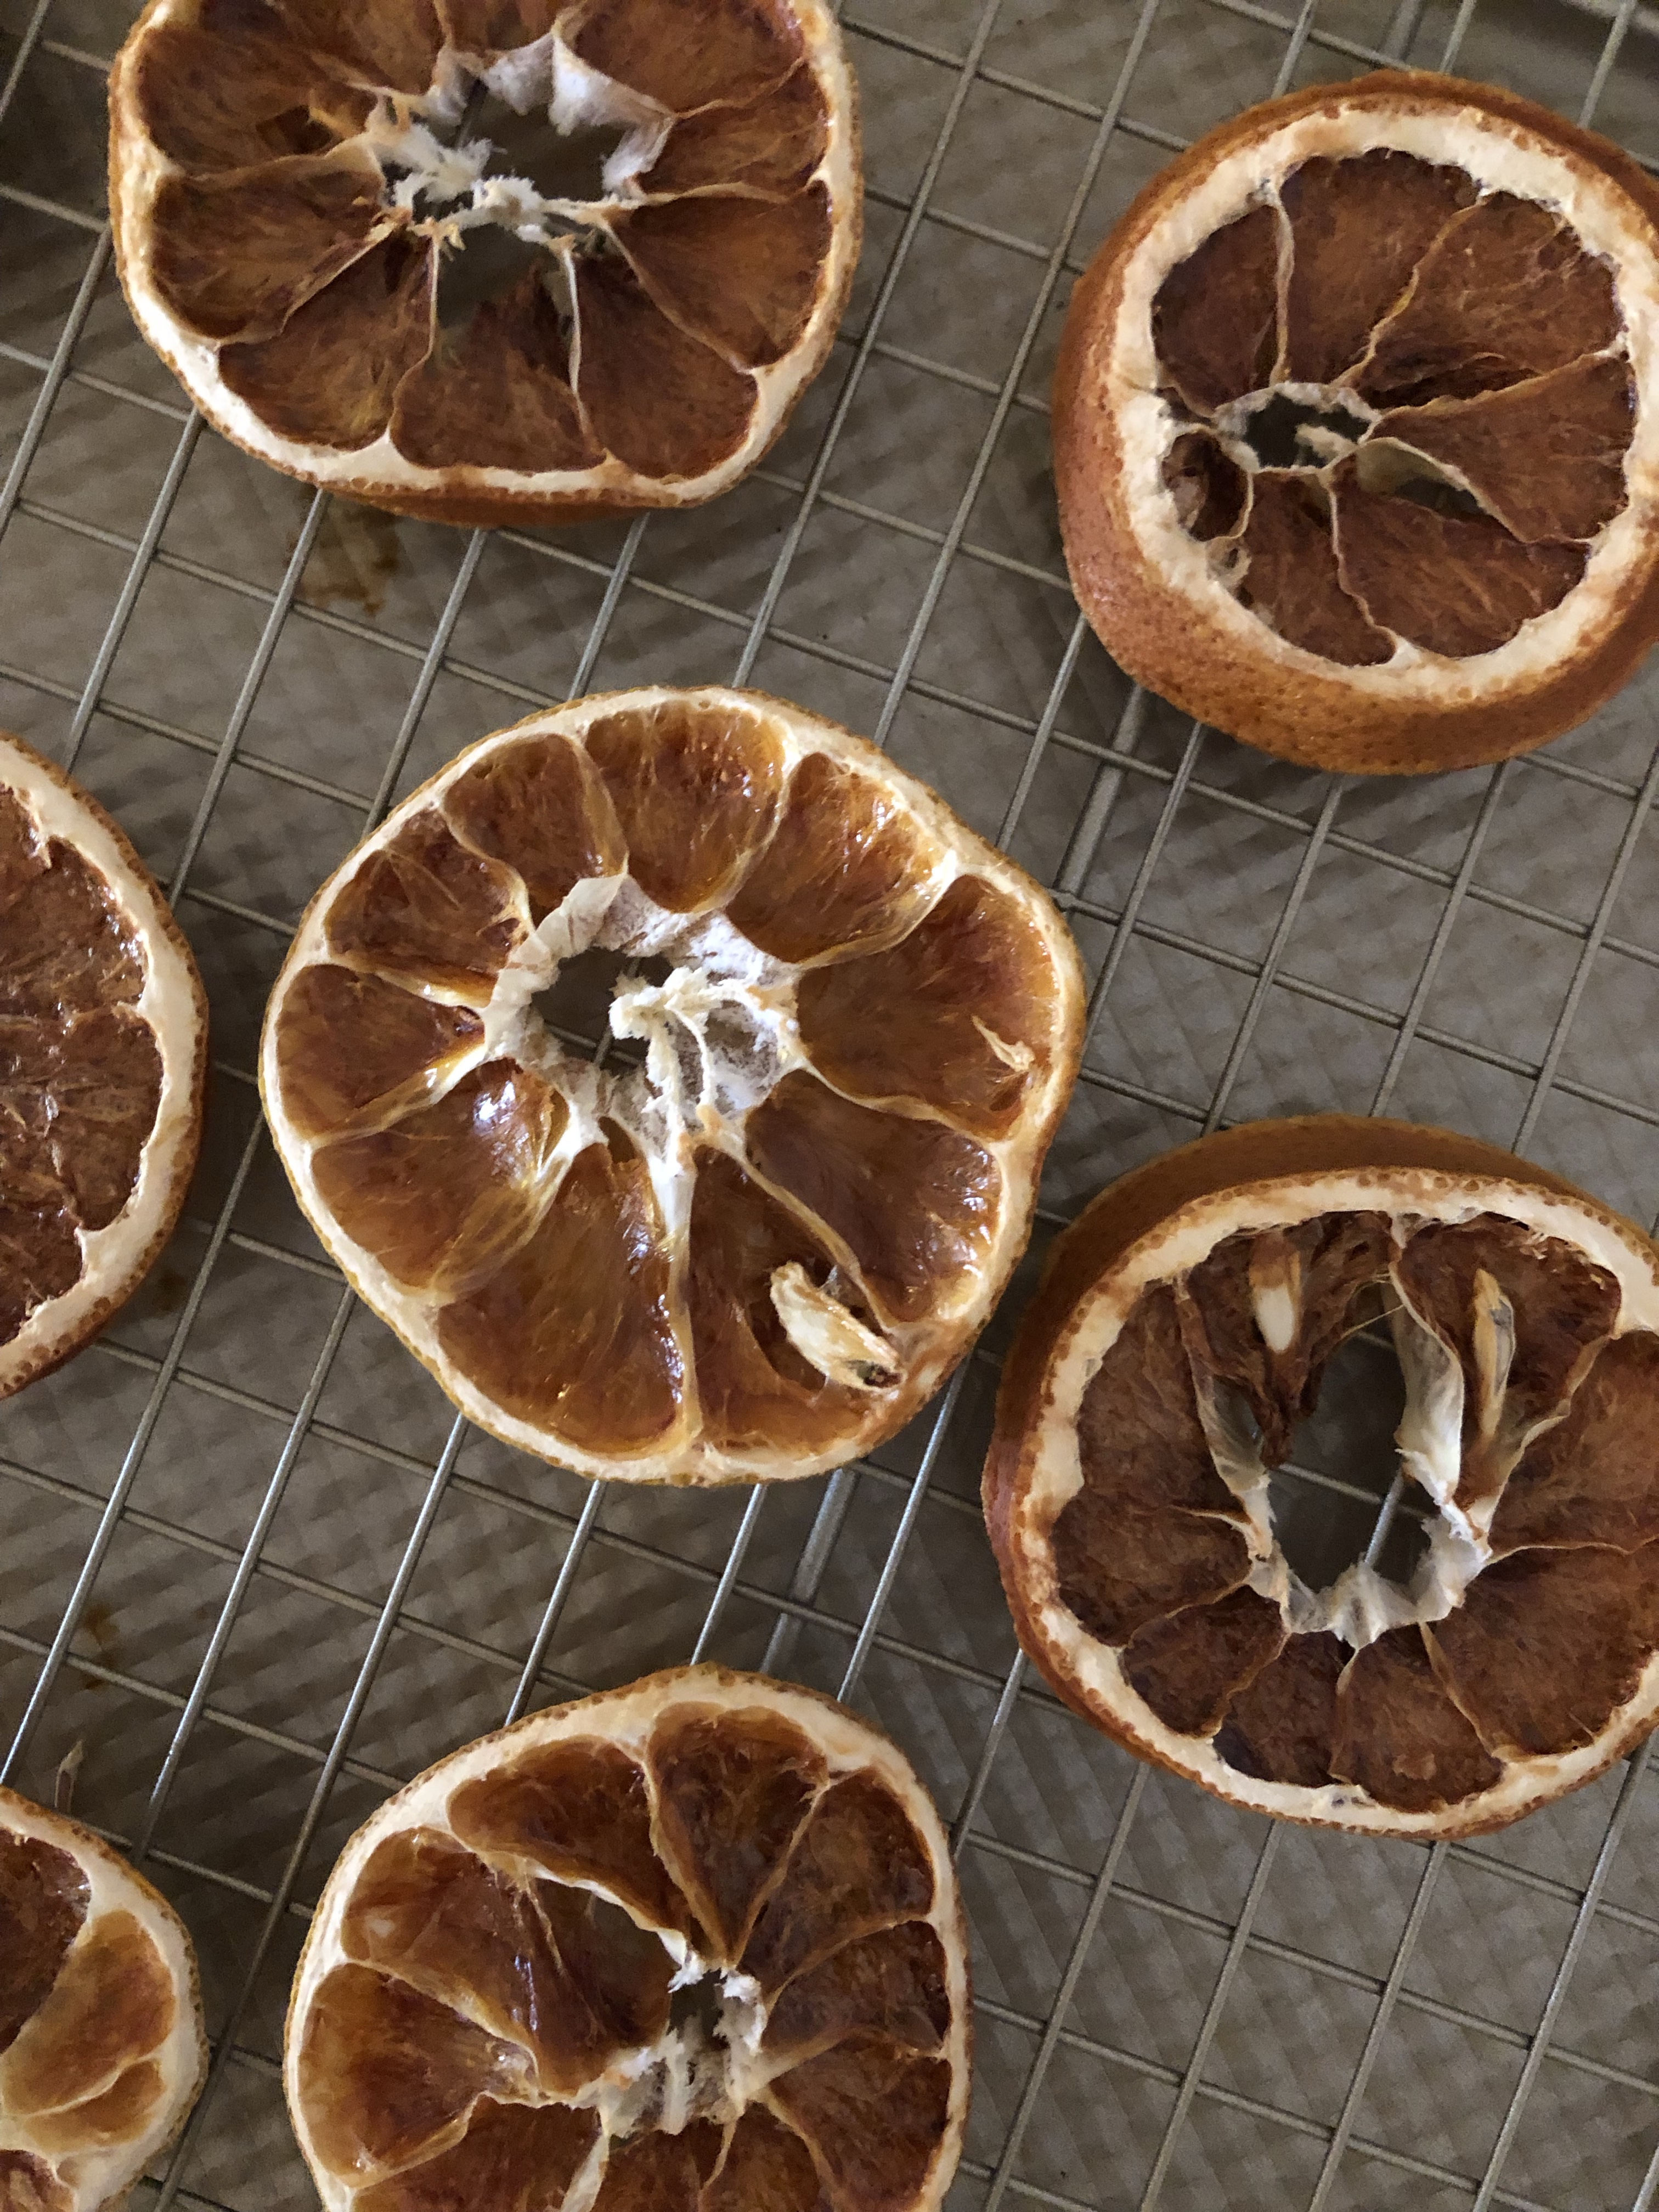
dried citrus.
Time to deck the halls! The first time I tried drying citrus it was a major fail. I’m happy to report that I tried again and figured it out! And, I can share that these dried citrus pieces have survived 2 Christmas seasons so far and are safely stored for…
-

journaling advent calendar.
Scrambling to get an advent calendar together? Look no further! This low-prep journaling advent calendar requires at bare minimum 24 pieces of paper and a pen! I don’t recall ever having an Advent calendar as a kid, but as an adult I’ve been intrigued by them and have wanted to…