Happy Thanksgiving! Ever since making mini felt pie slices for a custom order, I’ve been contemplating a pie slice garland! I channeled my Pietisserie experience for pie inspo.

For this project you will need:
- Felt in pie colors (think browns, deep berry colors, whipped cream colors)
- Twine or other cord
- Fabric scissors
- Hot glue

Make your favorite pies!


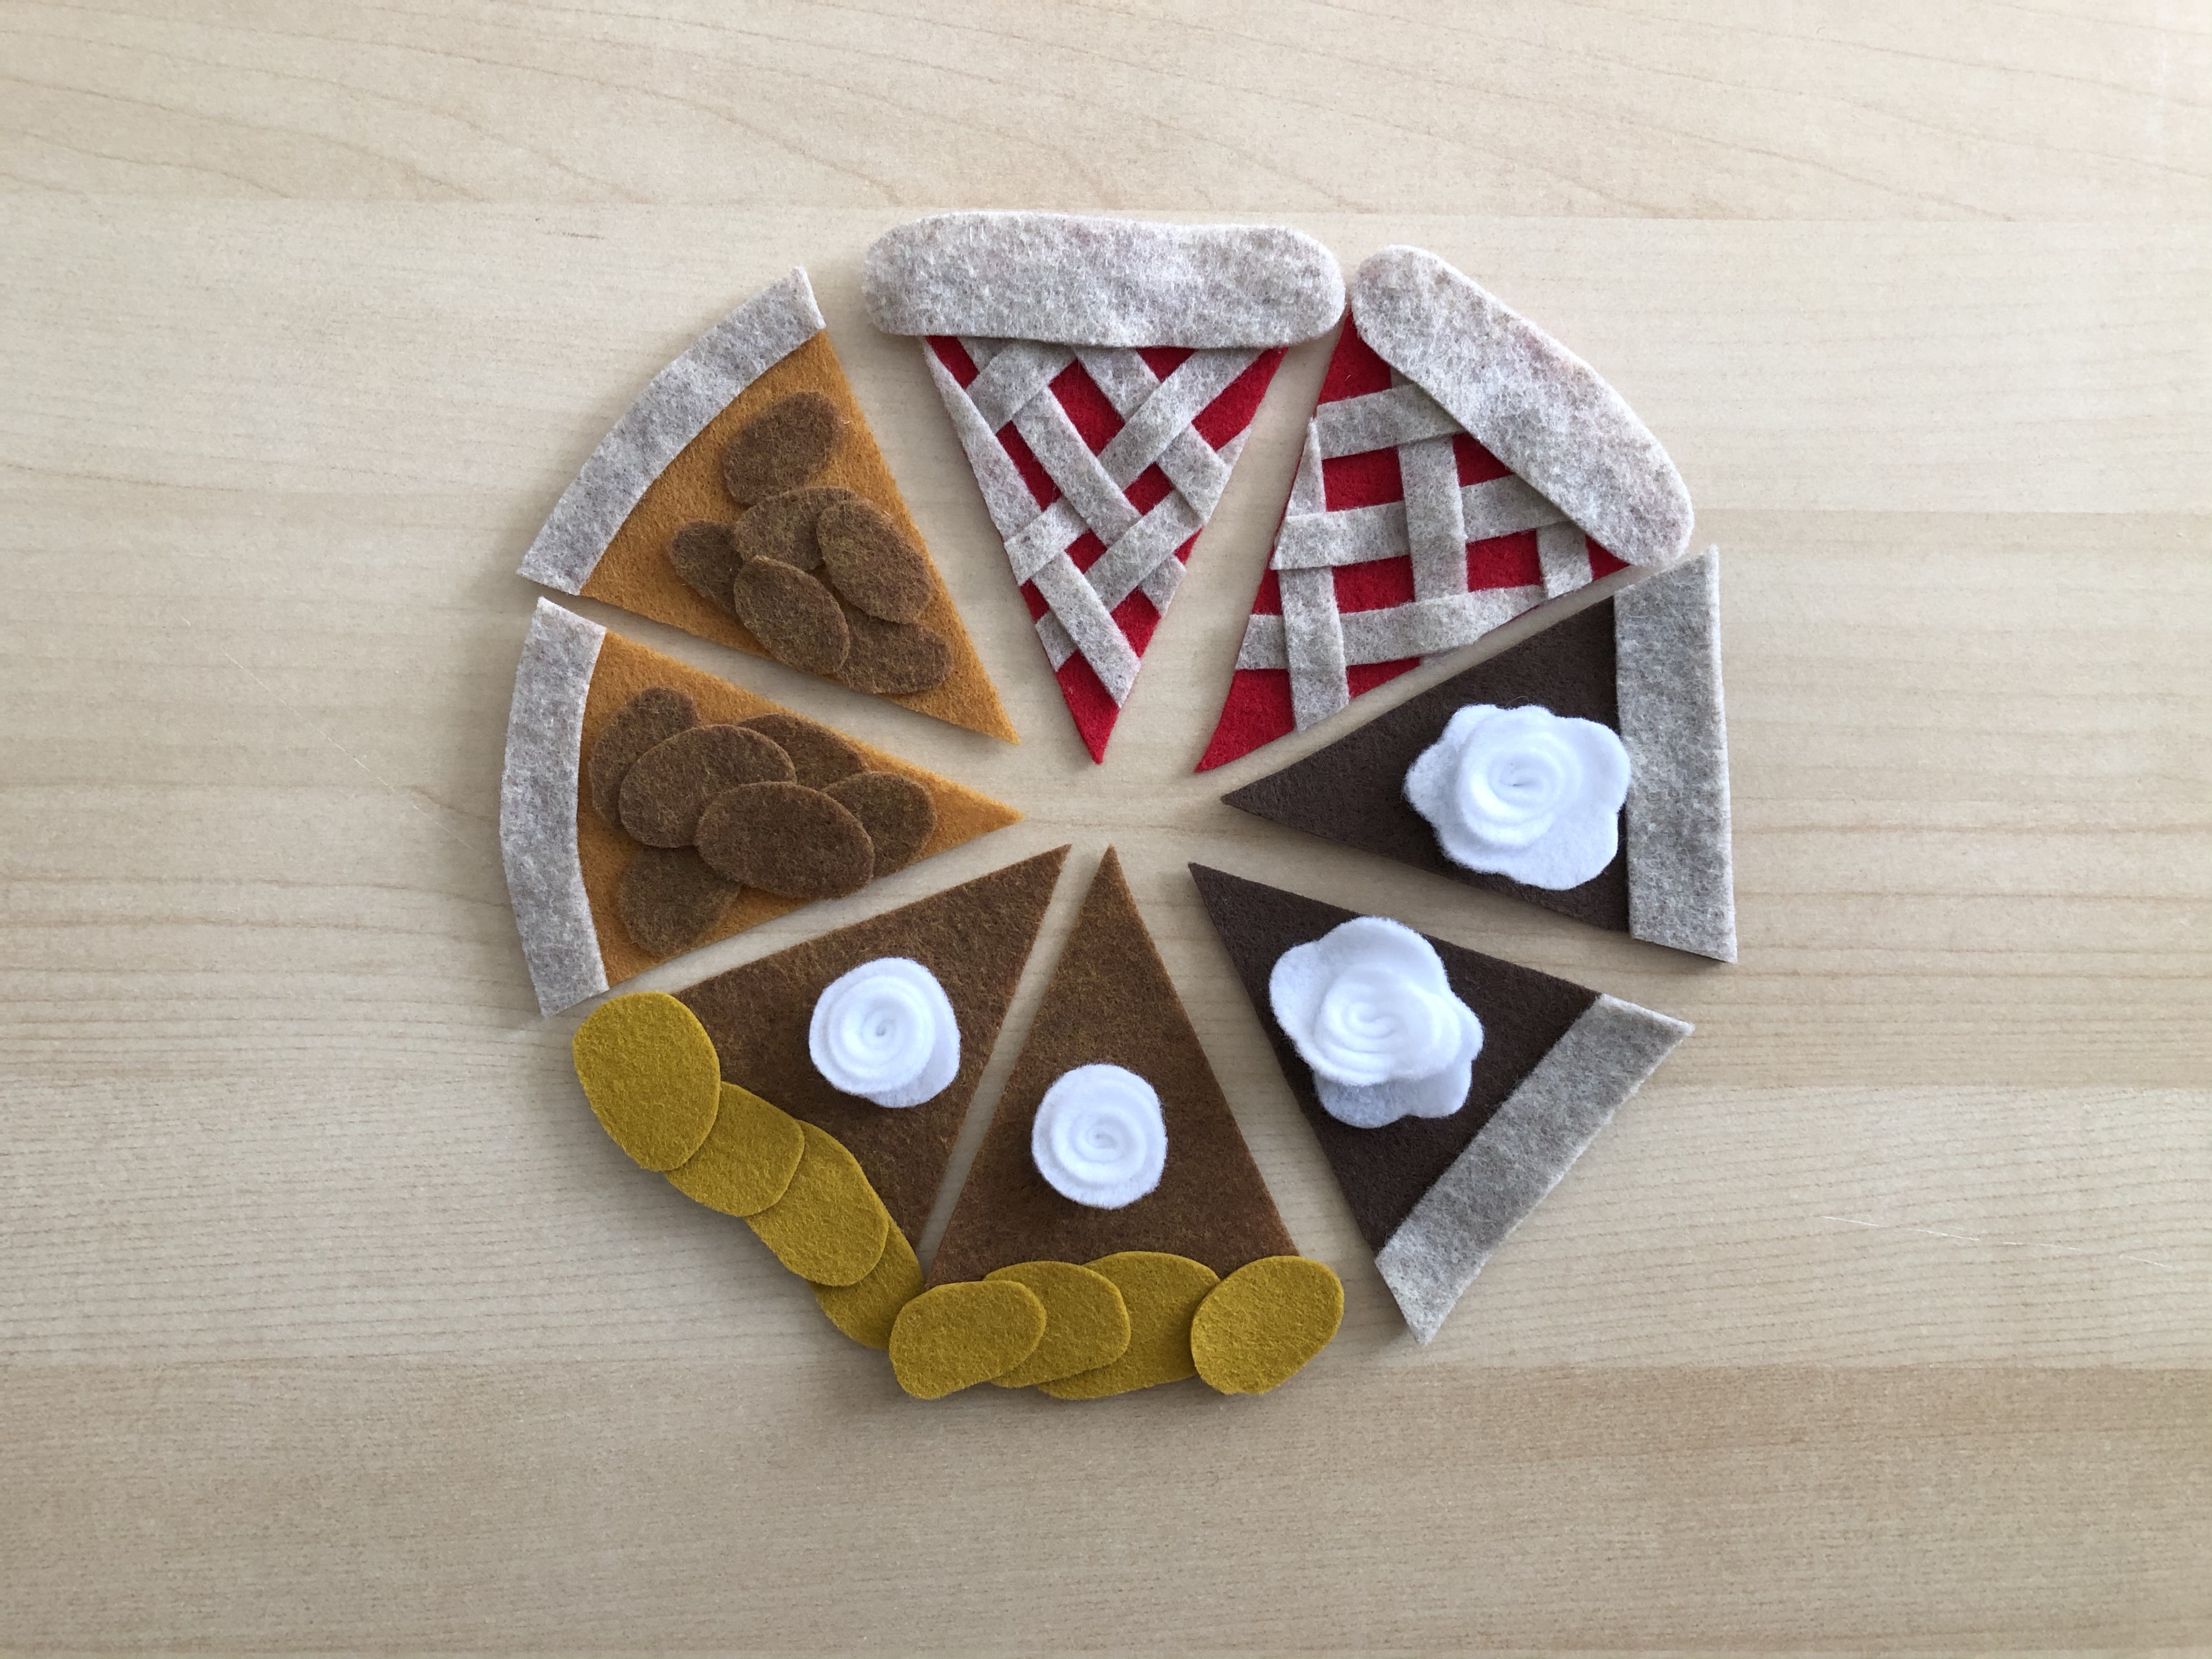
Pumpkin pie with dollop of whipped cream: Cut a triangle for the pie base. Cut rough ovals for the crust. Cut a spiral, roll, and glue for the whipped cream. To assemble, glue the crust pieces in a overlapped fashion. Glue the whipped cream in the center of the slice.


Cherry pie with lattice work: Cut a triangle for the pie base. Cut a long rough oval for the crust. Cut thin strips and create a woven lattice. Glue the lattice first and trim excess lattice. Then glue on the crust.


Pecan pie: Cut a triangle for the pie base. Cut rough ovals for the pecans. Cut a curved line for the crust. To assemble, glue on the crust and trim excess as needed. Glue on the pecans – pile them on top of each other.


Chocolate cream pie (my personal favorite!): Cut a triangle for the pie base. Cut a straight line for the crust. Cut a spiral with scallops, roll, and glue for the whipped cream. To assemble, glue on the crust and trim excess. Glue on the whipped cream.


On the back of each pie slice I created loops so they could move along the twine when assembled. Cut (coordinating) felt rectangles and glue onto the back of each pie slice (only place glue on the ‘top’ and ‘bottom’ of the rectangles, leaving the center unglued). Cut twine and sew through the loops. Tie overhand knots on each end of the twine to act as a stopper and for hanging.


Ready for the Thanksgiving feast! What’s your favorite pie to make or eat? Share below!
Leave a Reply