Do you ever see a craft supply and think “oh I want to make something with that”? Yeah, that’s me always. I found these oval-ish shaped keyrings and immediately thought mini macrame project! Here’s a quick macrame craft that uses three things.


Materials
- Yarn (use thinner yarn for more detailed work)
- Keyring (find these in the jewelry section of your local craft store)
- Scissors

For smaller macrame projects like these, thinner yarn works best. You can include a lot more detail with thinner yarn. Bulkier yarn will yield a chunky look. You can’t get a lot of detail in when using chunkier yarn because you start out with less strands, but it still looks cute!

For all four projects I used one or two knots. They all start with a Lark’s Head knot. I like to call this the luggage tag knot because this is how I loop my luggage tags on my bags.


Lark’s Head Knot
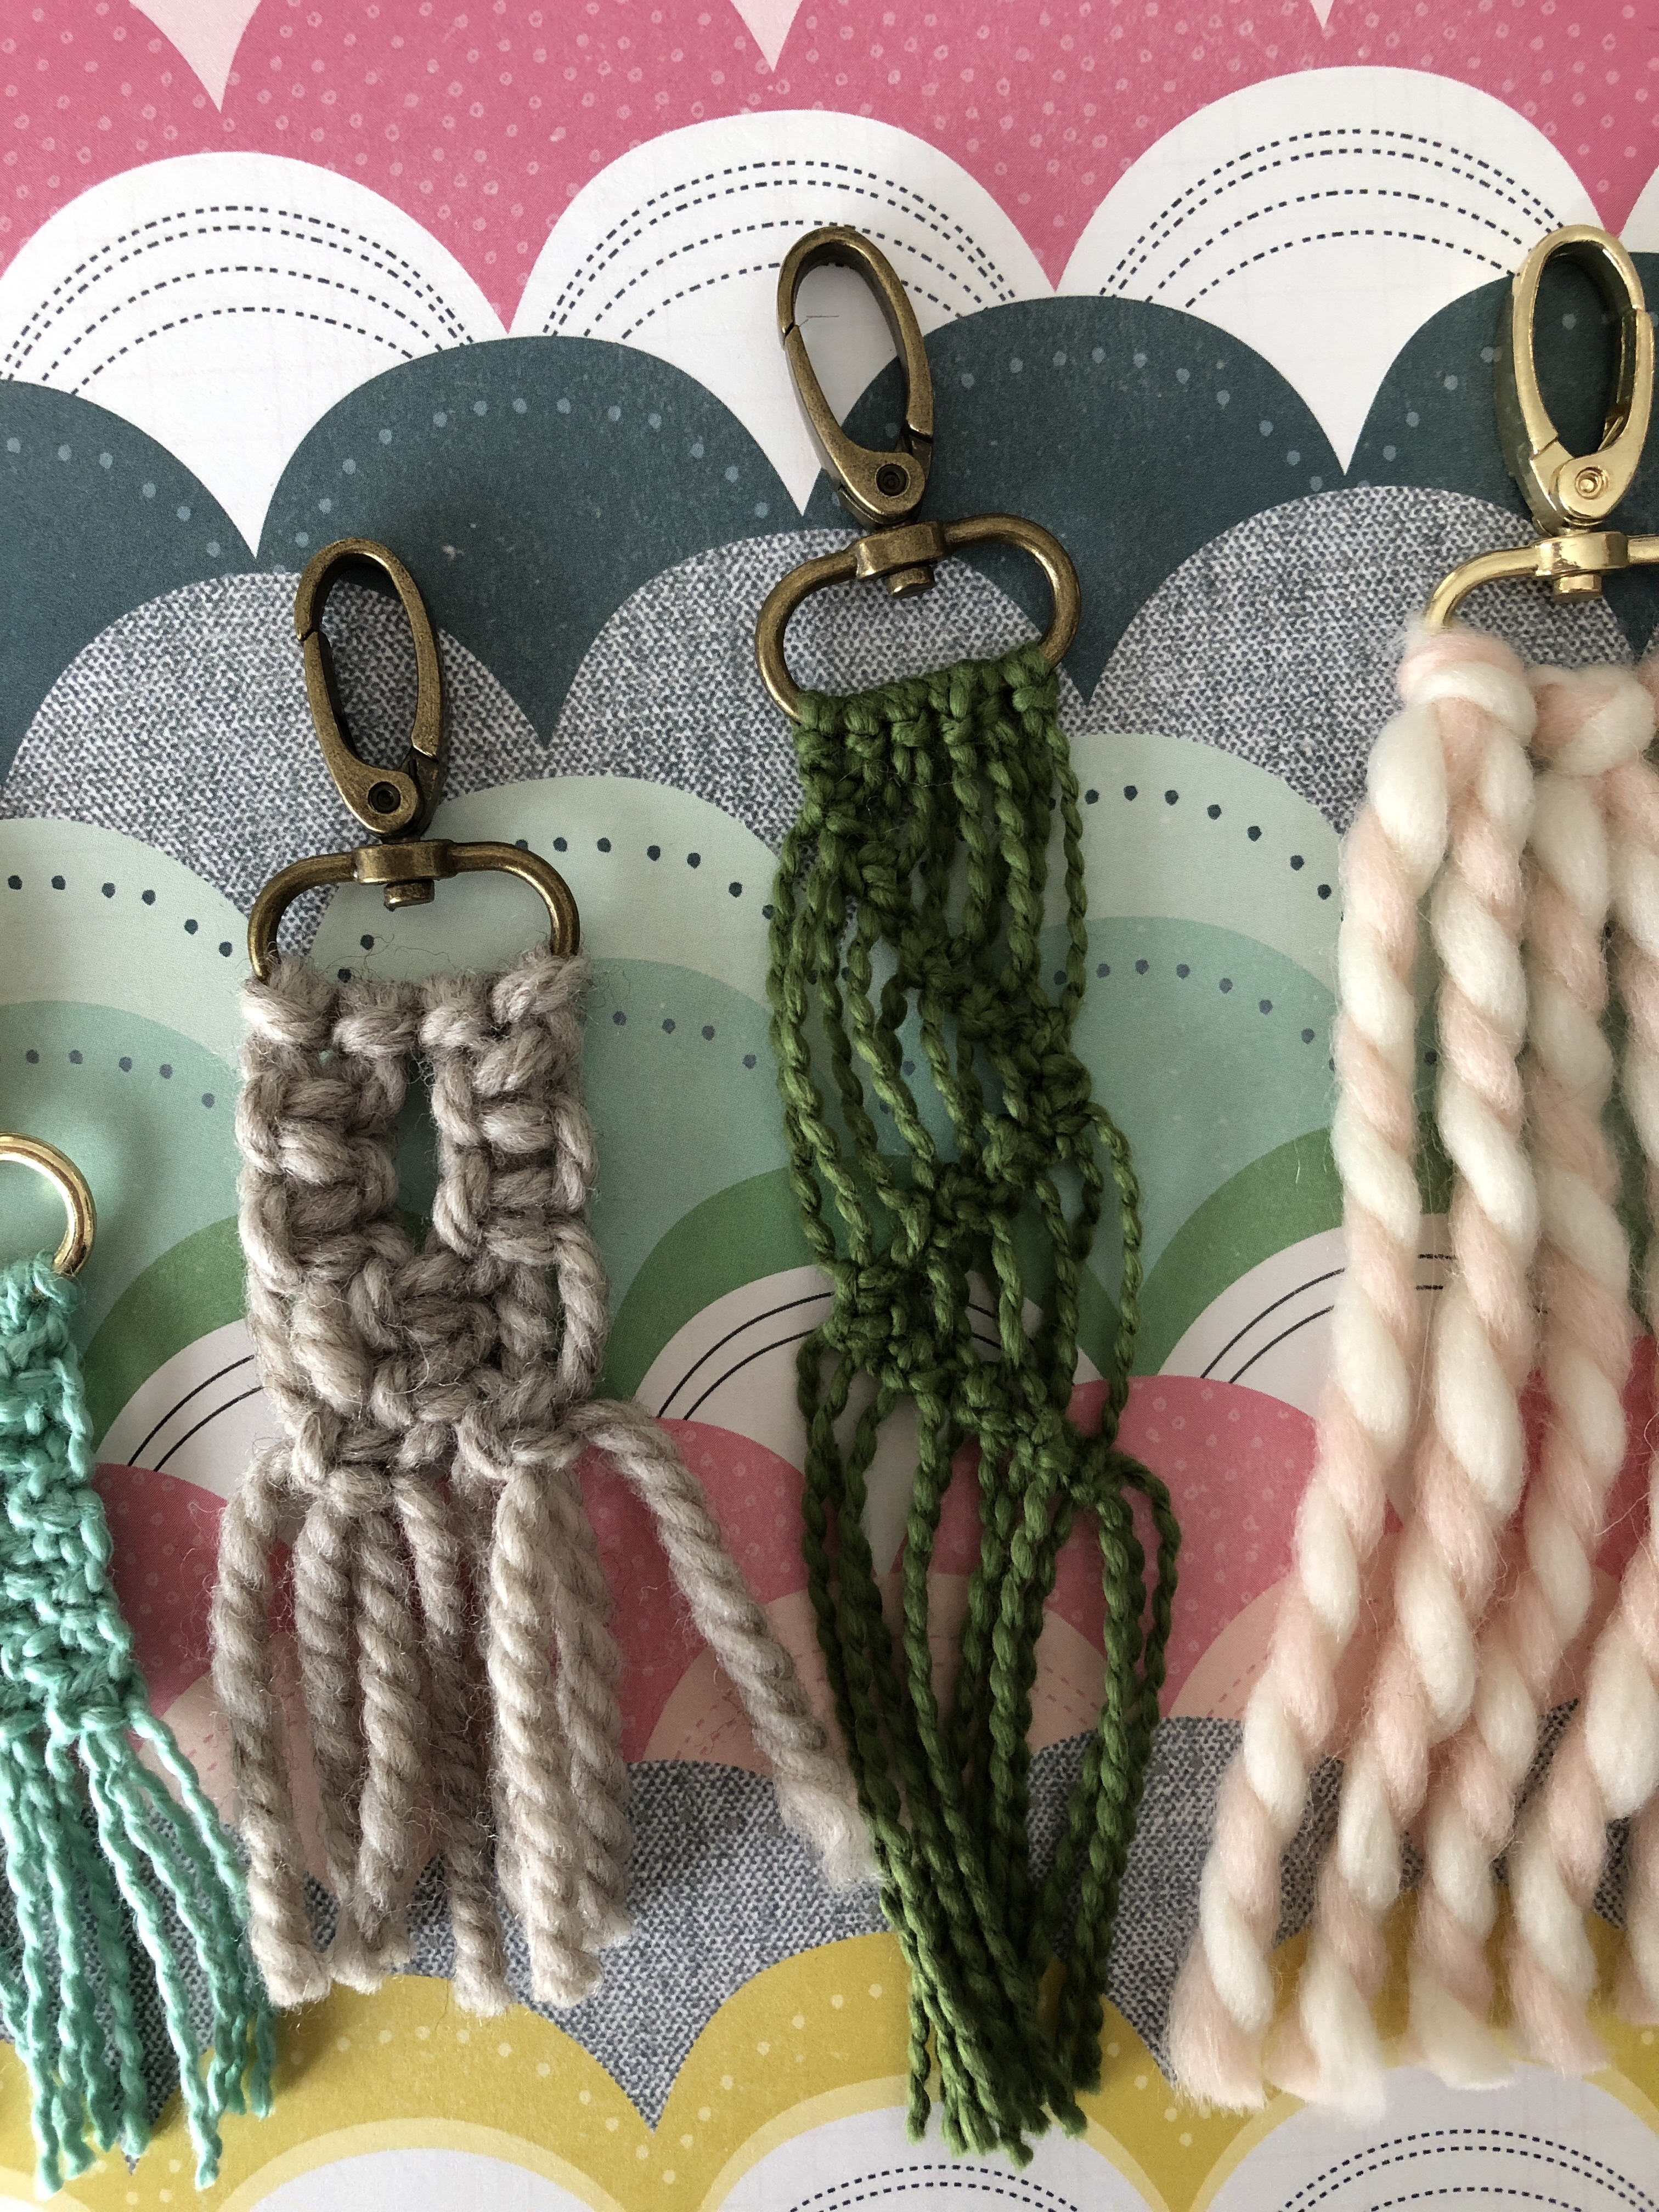
Cut a 12-inch piece of yarn. Fold it in half. Place the folded end under the keyring, loop the two loose ends up through the loop. Pull to tighten and secure. Repeat. I used six strands for this first project, four for the grey, six for the green, and three for the pink.

For the blue, green, and grey pieces I used a square knot to create patterns.
Square Knot
Work in groups of four consecutive strands of yarn, the inner two will be the anchor. The outer two strands will weave across the anchor strands. Place the left-most strand over the center strands and across to the right, creating a number ‘4’. Place the right-most strand on top of the left strand, pass under the anchor strands, and back through the left strand loop. Pull to tighten and secure.


Repeat in the opposite direction to complete the square knot. Place the right-most strand over the center strands and across to the right, creating a backwards number ‘4’. Place the left-most strand on top of the right strand, pass under the anchor strands, and back through the right strand loop. Pull to tighten and secure.
Detailed row instructions to follow. Happy macramaking!
 Row pattern for the blue keychain:
- Square knot strands 1-4, 5-8, and 9-12
- Skip the first 2 strands. Square knot strands 2-6 and 7-10. Skip the last 2 strands.
- Square knot strands 1-4, 5-8, and 9-12
- Skip the first 2 strands. Square knot strands 2-6 and 7-10. Skip the last 2 strands.
- Square knot strands 1-4, 5-8, and 9-12
- Skip the first 2 strands. Square knot strands 2-6 and 7-10. Skip the last 2 strands.
- Square knot strands 1-4, 5-8, and 9-12
Trim excess strands as you wish.
 Row pattern for grey keychain:
- Square knot strands 1-4 and 5-8.
- Square knot strands 1-4 and 5-8.
- Skip the first 2 strands. Square knot strands 3-6. Skip the last 2 strands.
- Skip the first 2 strands. Square knot strands 3-6. Skip the last 2 strands.
- Square knot strands 1-4 and 5-8.
Trim excess strands as you wish.
 Row pattern for green keychain:
- Square knot strands 1-4.
- Skip the first 2 strands. Square knot strands 3-6.
- Skip the first 4 strands. Square knot strands 5-8.
- Skip the first 6 strands. Square knot strands 7-10.
- Skip the first 8 strands. Square knot strands 9-12.
- Skip the first 8 strands. Square knot strands 9-12.
- Skip the first 6 strands. Square knot strands 7-10.
- Skip the first 4 strands. Square knot strands 5-8.
- Skip the first 2 strands. Square knot strands 3-6.
- Square knot strands 1-4.
- Square knot strands 1-4.
- Skip the first 2 strands. Square knot strands 3-6.
- Skip the first 4 strands. Square knot strands 5-8.
- Skip the first 6 strands. Square knot strands 7-10.
- Skip the first 8 strands. Square knot strands 9-12.
Trim excess strands as you wish.
Leave a Reply